7 Simple Techniques to Enhance Your Images Instantly

In the modern times we live in, high quality images and photo enhancers are just some of the things that we yearn for. Whether you’re a content creator or a marketing manager, you need certain techniques to ensure that your photo is top notch.
In this article we will discuss seven different ways that you can achieve this. Regardless of if you need to sharpen blurry images or to remove image backgrounds, you will learn how easy and accessible these techniques are to implement. These methods will not only serve as image enhancers but also elevate your image to a whole different level.
7 Simple Techniques to Enhance Your Images Instantly
01: Adjust Lighting for Better Brightness
Lighting plays a crucial role in the appeal of any photo. This feature helps in improving the overall lighting in a photo to make it look brighter and more balanced. By adjusting the brightness and overall lighting, you can transform your dark and dull looking picture into a more vibrant and eye-catching visual.
This enhances pictures by fixing lighting errors that probably go unnoticed and makes it look more natural. So whether it comes down to fine tuning shadows or a quick brightness tweak, Imglarger has you covered in that regard.

Adjust Lighting with AI Image Enhancer
- For this tool you can go to the AI Image Enhancer tab.
- Next, click on the upload your photo option and select which photo you want to enhance.
- The tool will then automatically prepare your image for photo enhancement. The AI image enhancer is designed to optimize brightness and colour correction so no manual adjustments are required.
- Once the AI is done with its process, you can see the preview of the enhanced image alongside the original image.
- Finally, you can download the picture and save it to your device.
02: Use Filters to Enhance Your Photo
Filters are a quick and effective way to bring out your photo’s best features. By applying the filters that suit your photo’s mood, you can instantly enhance its colors and contrast while adding a few other features if necessary.
This technique is really useful for creating consistent aesthetics in social media feeds and for marketing material. It also allows for the user to have their own creative flexibility by toying around with the filters and finding their own unique style.

Use Right Filters with AI Image Enhancer
- Head over to Adjust Image Filters and press on any of the tabs in front of you.
- Upload the specific image you wish to add a filter to.
- Once your image is added, press on the pencil shaped icon on the top right of the picture.
- On your left hand side you will see a panel with various different features to use and go ahead and click on the filters section.
- Choose from any of the filters available which include Chrome, Fade, Cold, Warm, Pastel, Mono, Noir, Stark, Wash, Sepia, Rust, Blues or Color and apply it.
- Press done on the top right side when you’re done picking your preferable option.
- Now your photo is simply ready to download.
03: Crop for a Cleaner Composition
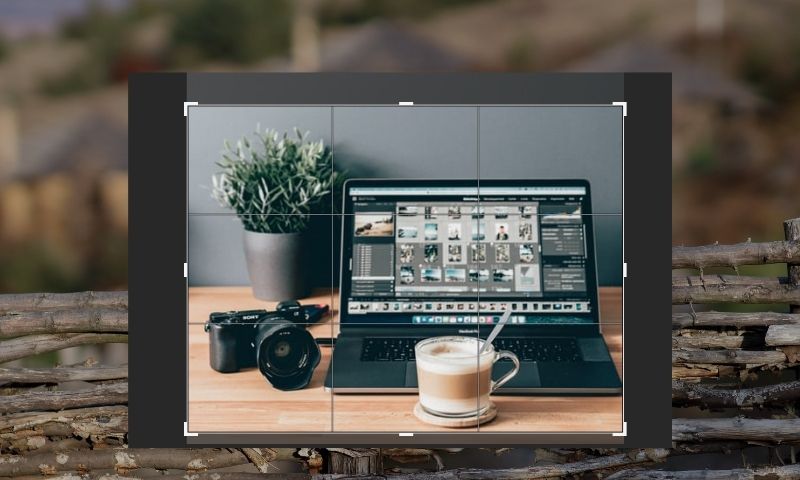
To enhance images further, cropping is a fundamental technique that helps in refining your photo’s composition. It not only improves the framing of the overall picture but also brings direct attention to its main subject. Removing any unnecessary elements from the edges can also help in bringing balance and symmetry to your photo.
So whether you’re focusing on an individual, a product or a landscape, cropping ensures that your photo’s key elements are presented in a clear and precise manner and thus making it an essential step for a cleaner and more professional look.

Crop Images with Imgtools
- Firstly, you go over to imglarger's image cropping tool.
- Insert the image that you wish to crop to the space available.
- Once your image is uploaded, a cropping frame will appear over it. You can drag the corners and edges and select the area that you want to keep.
- This tool also has a wide array of specific dimensions that it provides for you to use if you wish to. They have standard proportions as well as social media ratios.
- You can check the preview of the image once you’re done adjusting it.
- Now press the crop option and after it is done processing your image is ready to download.

04: Sharpen to Fix Blurry Photos
Sharpening is an essential technique for enhancing the clarity of photos and making them look more defined. These tools battle to enhance pictures and to sharpen blurry photos. Now it works by increasing the contrast along the edges within an image which makes those details pop out and look more distinct.
If the photo looks like it’s taken in a low light surrounding or in a fast moving kind of way, sharpening helps in improving that image’s overall crispiness. This method is especially valuable for bringing out fine textures and bettering readability which ends up giving your project a polished look.

Unblur a Photo with AI Image Sharpener
- To begin with, you open up imglarger's AI Image Sharpener tool.
- With the image that you want to sharpen you upload it to the input field.
- The AI automatically analyzes your image once you upload it so wait for it to finish processing. With its advanced algorithms the AI shows your image with reduced blurriness and a noticeable enhancement.
- In the preview section you can see a side by side comparison of your original photo and the one that has been tweaked by the AI.
- At last you can just download your newly edited image.
05: Reduce Noise for Smoother Images
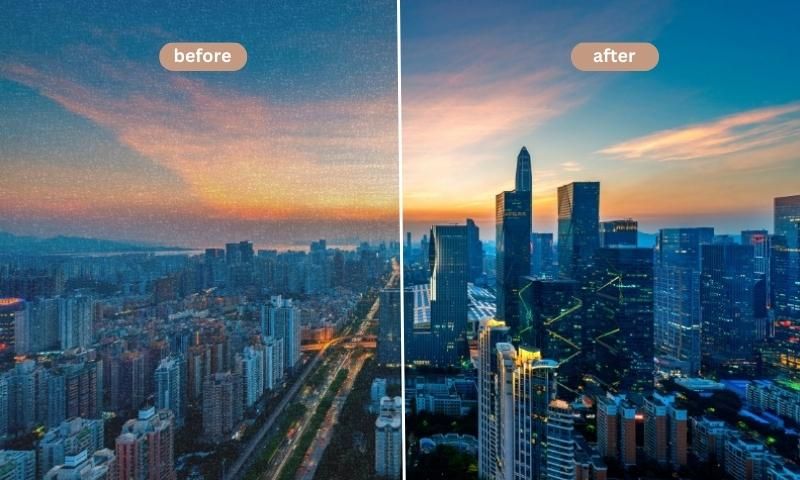
Noise or that grainy speckled texture can often draw your photo away from looking at its best. Now with photos that are taken in low light areas or with high ISO settings this is a real big issue. Reducing noise is a crucial step in creating a smooth and looking image.
This technique mainly works by minimizing that grain that appears while also preserving essential details and thus resulting in a visually pleasing photo. So whether you are editing portraits or product shots, noise reduction helps make your image look clearer and refined.

Reduce Noise and Grain from an Image
- Your first move should be to go to imglarger's Image Denoiser.
- Then, upload the image that you have.
- Once your picture is uploaded, the AI works its magic and automatically analyzes your photo and applies noise reduction to minimize grains.
- This tool allows you to notice the changes by giving you a side by side comparison in the preview area.
- You can now download your image once you are satisfied with the result.
06: Change or Remove Backgrounds
A cluttered or distracting background often or not takes away the focus away from the main subject of the picture. Changing or removing the background in such cases is a simple yet powerful way to make your visuals look much cleaner.
Many users wish to either isolate the subject, add a new backdrop or create a transparent background and tools that can do this are very beneficial for them. Performing this technique is ideal for any kind of photography and transforms your images to make them versatile for any occasion.

Remove Image Background with Imglarger
- The first step should be to head on over to Imglarger BG Remover.
- After this, you can insert your image where the website asks you to.
- The AI runs its own analysis and separates the main focus of the image from its background.
- If you wish you can press the pencil icon on the top right of the image and fine tune it to your desire.
- After you are done, observe the previewed space and see if the background has been successfully removed.
- Your image is now ready to be downloaded.
07: Remove Unwanted Objects
Last but not least, unwanted objects in a photo are set to distract viewers from what is really important in that picture. Removing these interferences can help in setting up a more elegant and perfected piece to show to the viewers.
There are many unwanted elements ranging from an accidental passerby to blemishes on a surface that can irritate a photographer. This technique enhances the overall composition and delivers a very visually appealing picture.

Remove Objects from Photos with Object Remover
- To remove objects from your photo, visit Object Remover website.
- You can now upload the image that you want to edit.
- Let the AI do its thing as it locates the objects that you wish to remove.
- The tool then provides you with a preview that shows all possible objects that have been separated from the picture.
- Once you have made your adjustments, you can now download your photo.
Why Does Photo Enhancement Matter?
As mentioned before, photo enhancement plays an important role in ensuring images make a long lasting impact on the viewers that see it. Whether you are a beginner or a professional, high quality images are demanded equally by both parties. It improves the visual appeal by enhancing colors, contrast and the overall brightness of the picture.
Not only that but it corrects imperfections such as blurriness and grainy photos which gives your photo a more gleaming look. By adjusting these practical issues and providing tools that can change or remove backgrounds, enhancing proves itself a versatile adversary. AI powered tools make sure that they help this process by editing it for you and saving up time and effort.
Conclusion
You have now probably realised how vital it is to enhance pictures. Thanks to the new era of AI powered tools, it is no longer a tedious job that one has to do on their own. So, whether you are a professional or not does mean anything when it comes to refining your image as methods that sharpen your images or remove image backgrounds should be accessible by all.
By using AI photo enhancement tools provided by Imglarger, you can achieve a professional-grade photo in no time. Not only does it require minimal effort but it always delivers remarkable results. So go on ahead and explore these tools to their fullest potential. You won’t regret it!