How to DIY an ID Photo and Enhance Its Quality

Is it time to get a new ID picture? Or do you really not like how your other photo turned out? When it comes to taking ID photos, going about it through the DIY route is becoming a pretty popular pick. It isn't just super affordable but it’s also easy to get the professional look that you’re going for. We know it can be a little hard to get the professional-esque picture. As you continue, you’ll be learning about how you can take your own ID picture and use some tools to enhance its quality.
Why DIY an ID Photo?
DIYing your ID picture saves both your time and money. Instead of having to schedule visits to a professional photo studio, you can create your own high quality ID pictures from your bedroom. And you won’t be alone in this journey. With AI tools available wherever you look, you can now take your own professional pictures. So whether you’re on a tight budget or looking for a last minute picture, DIY is the way to go about it.

How to DIY an ID Photo
There are two pretty simple ways to DIY your ID picture. You can either do it entirely by yourself. Or get some help from AI. Let’s see:
Method 1: Take the ID Photo
Taking a proper ID picture starts by getting a good picture of yourself. And that involves keeping track of a few things:
The Right Background
For any ID picture, the background is not something you can go around experimenting with. You’ll need a plain, light coloured wall that’ll give you the professional look. Ideally, you’d want to stick to white or gray backgrounds. You’ll also have to make sure that there’s nothing in your background.
The Lighting
Proper lighting is critical. To get the professional look, you should be looking to avoid harsh, direct lighting that might create any shadows. And going for a dimmer room is a big no no. For a good picture, try sticking to soft lighting choices to get an even tone. You can also consider standing near a window during daylight hours for a good, natural look. But remember, no shadows.
Dressing Up
Looking good is an essential part of your ID picture. Your hair should look clean and you’ll need to look well groomed. You should always avoid patterned clothes and any super bright colors. It’s better to stick to solid and neutral tones whenever taking official pictures.
Camera Placement
Now that you’re all dressed up and ready, it’s time to take the picture. Ideally, to take the picture you’ll need a tripod. But if that isn’t possible, a stack of books works just as well. Place your camera on the stand making sure that it’s at eye level and directly opposite to you.
Distance
Once the camera’s set up, you should move about 4 feet away. Try taking an experimental picture to see what the frame looks like. You should make sure that only your head and shoulders are visible. Additionally, your face should cover around 2/3s of the frame.
Pose
All that’s left is figuring out a pose. For ID pictures, the ideal pose is to do nothing. You should just look into the camera with a completely neutral expression. No smiles and no frowns either. Make sure your eyes are wide open.
For more tips to take an ID photo, you can read the article below.

Method 2: Using AI ID Photo Maker
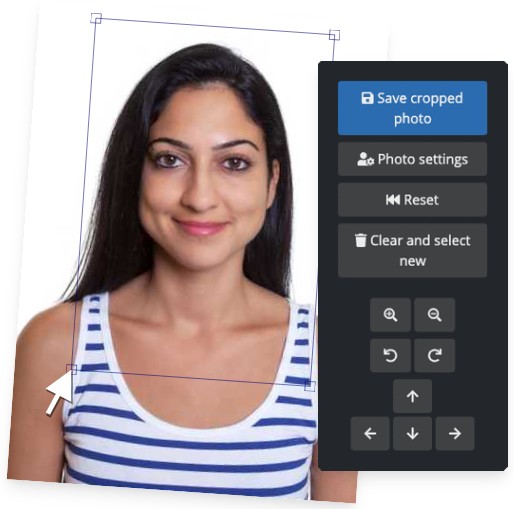
If putting in the effort to DIY an ID photo isn’t for you, AI tools are here to solve your problems. Just as the name says, an AI ID photo maker is an online tool that you can use to create your professional looking pictures effortlessly. These tools work to automatically format pictures to match the requirements you put in. With that, there’s no worry for any technicality issues.

How To Use An AI ID Photo Maker
- Add in the picture you’ve taken.
- Select The ID Type. (Passport, Student ID, etc.)
- Hit Upload & Start. The AI will adjust any background or proportion issues.
- Preview the picture to see if any changes are needed.
- Download the final image.
Advantages Of Using An AI ID Photo Maker
- Most tools are user friendly meaning you won’t need any technical skills.
- The AI tools adjust any issues according to the specifications you put in.
- The entire process only takes a few minutes.
When Will We Need to Enhance an ID Photo

When trying to DIY your picture, you may run into a few issues that you just can’t overcome. When that happens, you’ll need to enhance the pictures. Here are some situations where that may happen:
- Pictures with poor lighting and a grainy filter.
- Distracting backgrounds that ruin the professional look that you need.
- Any visual blemishes that need to be eased out.
How to Enhance ID Photo Quality
Reduce Noise From ID Photo
Finding “noise” in your pictures is pretty common if you’re taking them in low light areas. The noise in question refers to a grainy or pixelated filter that covers your pictures. This is going to ruin the professional look that you’re trying to get in your ID pictures. But unless you can retake the picture in better lighting, there’s no way to get rid of it manually. That’s where Imglarger can help:

Reduce Noise From ID Photo With Imglarger
- Head over to imglarger's image noise reduction tool.
- Add in the ID photo that you’ve taken.
- Hit Upload & Start to begin the process.
- Use the slider to see the edits that have been made.
- Download your enhanced picture.
Sharpen & Unblur ID Photo

Blurry pictures will never give you the professional-esque vibe that you’re going for. And that’s a big issue that you’ll be dealing with if you don’t have a tripod at hand. But with AI, you can simply sharpen the picture to fix the blurred up issues in your pictures.
How To Sharpen an ID Photo
- Visit the Imglarger website and select the “AI Image Sharpener” tool from the navigation menu.
- Add in the blurred up picture. You can add one or more for processing.
- Hit Upload & Start to let this sharpeing AI to enhance the photo clarity.
- Preview the results instantly online and use the slider to compare the before and after images with ease.
- Download your newly sharpened picture.
Remove Imperfections from the Face

As we’ve stressed upon multiple times, you do not want any distracting features in your pictures. Unfortunately, this can include tattoos/wrinkles/large pores that may be highlighted due to the lighting in your pictures. By smoothing these features out, you’ll be able to give your ID photo a polished look.
Remove Imperfections From The Face Using Imglarger
- Head over to this free object removal tool to get started.
- Drag or drop the ID photo that you want to clean up.
- Use the slider to adjust the highlighter’s size. Slide to the right for larger objects and to the left for smaller details.
- Use the highlighter to highlight aspects that you want to remove.
- Hit Remove Objects and wait for a few seconds.
- Once the object is removed, click on the save icon in the top right to download your distraction-free picture.
Printing the ID Photo
Once you’ve taken the ID picture and enhanced it with Imglarger, all that’s left is to print. If you’re doing this at home, you’ll want to use a high res printer with some glossy photo paper. Manually adjust the printer’s setting to the dimensions that you need. We’d also suggest printing a bunch of copies so you won’t have to do it again later.
If you’re getting the printing done professionally, there’s nothing to worry over. Just look for a local printing store with good ratings. Also make sure you double check the store’s picture dimensions with the ones you need.
Conclusion
DIYing your ID picture is a pretty quick and simple fix for anyone who needs official pictures. By using advanced tools like Imglarger, you’ll be able to edit the pictures to your liking without needing any technical skills. If you’ve read along this far, you now know how you can save your money and effort while getting yourself professional-esque ID pictures. Now it’s your turn to put what you’ve learnt to the test!
